I bought this pen only two weeks ago, just days before the London Autumn Pen Show, in what I jokingly referred to as a warm-up purchase.
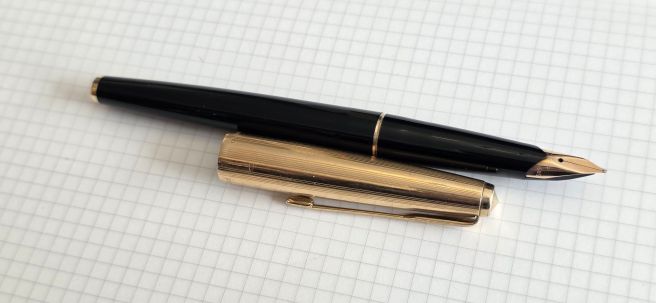
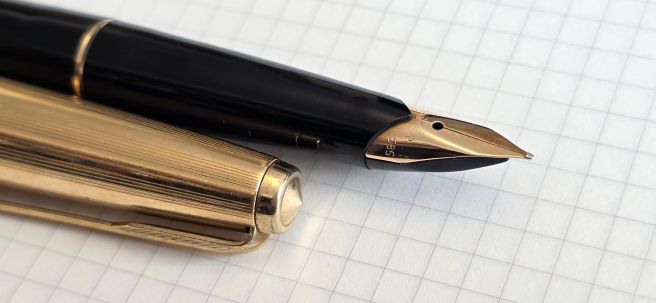
I had spotted the pen on eBay. It was offered for immediate sale at £60.00, rather than auction. After admiring the seller’s close up photos, including shots of the nib from several angles, I was keen to secure it and did not bother negotiating. I had looked at a few different Parker 65 models before but did not know much about them, other than that I liked the style with the open nib. Despite having accumulated quite a number of vintage Parkers, this was my first Parker 65.
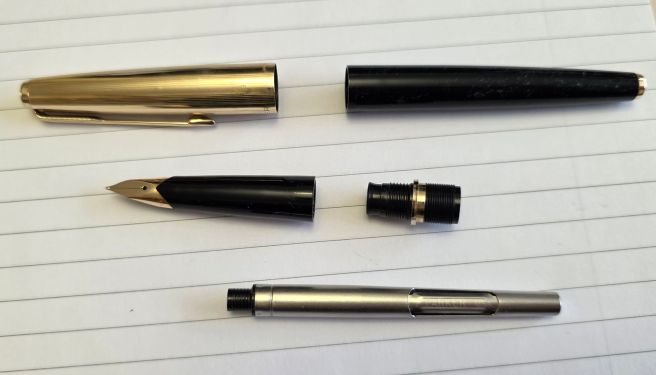
I am grateful to Tony Fischier for his excellent site https://parkercollector.com (previously called parkerpens.net) and specifically his information on the Parker 65 history. From this I learned that the Parker 65 was produced in various forms from 1967 to 1983. I believe that my pen is one of the later versions (the black plastic connector was introduced in 1969 and the metal finials, instead of grey plastic jewelled finials, were introduced in 1975). The pen has a connector which links the section on one side and the barrel at the other. This should be glued into the section with shellac, otherwise there is a risk of it leaking and coming undone unintentionally, when you think you are unscrewing the barrel.
I also found a helpful video from Grandmia Pens, on Youtube “How to service a Parker 65 fountain pen.” I have not yet fully disassembled mine, as I do not have the necessary tool to unscrew the ink collector and will need to buy one, or perhaps adapt one from a pair of tweezers.
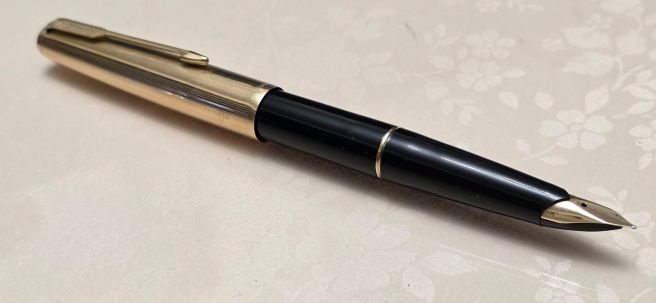
In short, my example Parker 65 is a cartridge converter pen, introduced as a “sister pen” to the Parker 61 but with an open nib as opposed to the 61’s hooded nib. Personally, I love the streamlined look of this nib and the way it follows the tapering contours of the grip section. Also it is a semi-flex nib in 14k gold, offering a softer writing experience with some “bounce”, although not full flex. The slip cap has the same type of gripping system as the Parker 51. It also posts beautifully, creating (surely!) one of the most sleek, elegant and comfortable pens ever.
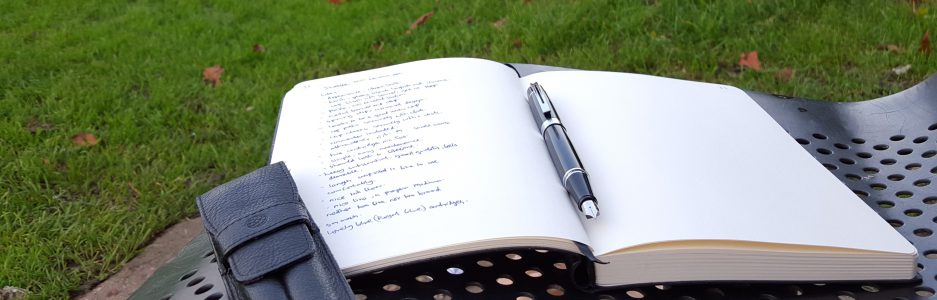
My pen did not have a converter when it arrived but I had one which fits. It takes Parker’s slim type of squeeze-bar converter. A wider one will go in, but can be felt brushing against the inside of the barrel. I filled the pen with Waterman Harmonious Green (to be distinctive in my Stalogy note book) and soon covered more than 10 enjoyable pages on my first fill.
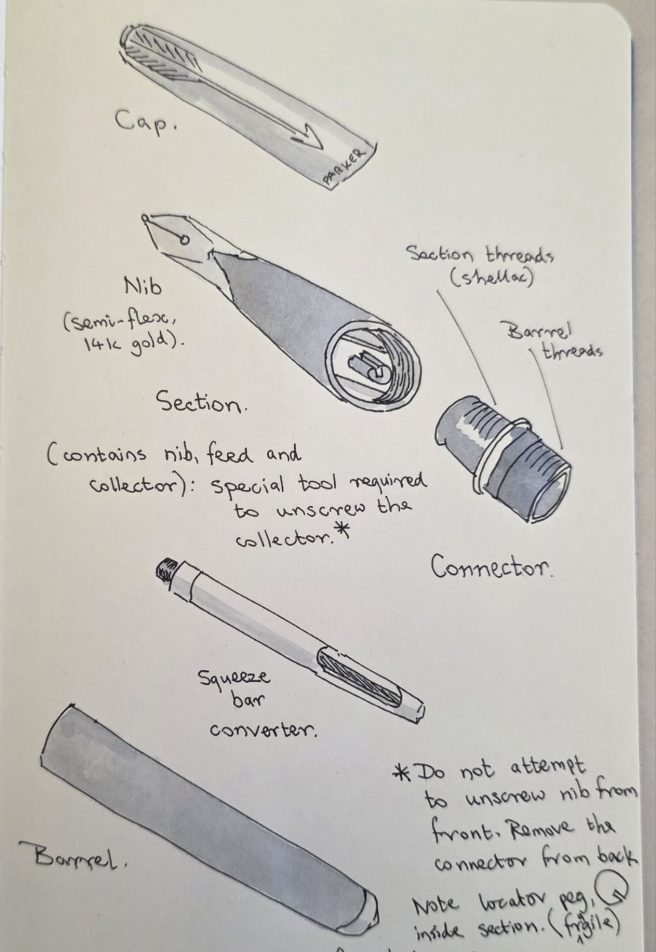
I gathered from the online resources mentioned above, that the Parker 65 had some design issues, (not necessarily “flaws”) or – to put it more charitably – things that are helpful to know especially before disassembling the pen. These can be summarised as follows:-
- Do not attempt to unscrew the nib and feed from the front. (This will crack the shell).
- To remove the nib and feed, you must first take out the connector. If glued into the shell, as it should be, apply some gentle heat to soften the adhesive first (but not too much heat, which may distort and damage the shell).
- According to Grandmia pens, the plastic rim of the connector may deteriorate, such that a replacement is needed. (Happily, mine shows no deterioration).
- Once the grip section has been separated from the connector, look inside the shell to see what type of tool is needed to remove the collector (not to be confused with connector!). Some have a single groove across the middle, like a screw head, whereas others (such as mine) are squared off on two sides, requiring a small pair of flat sided tweezers to unscrew the collector.
- Once the collector is out, the nib and the long feed (terminating in the cartridge piercer), should come out easily through the front of the shell. The gold nib can then be separated from the feed by gripping it with a piece of rubber and sliding it backwards off the feed.
- (Although I have yet to disassemble mine) there is a protruding peg inside the shell, at the 12 o’clock position which serves as a locator to insert the feed correctly. This could easily be broken if attempting to unscrew the nib.
- When reassembling the pen, the back of the feed, where it meets the collector, needs to be sealed with some liquified/melted wax, otherwise the pen will leak from this point. See Grandmia pens’ video to see how modelling wax is melted and applied to the necessary area.
- Note that the lip of the shell, where it extends partly over the face of the nib, is a weak point and can be cracked if too much pressure is applied to the nib. Also, if a gap opens up between the nib and this lip, it can lead to ink flow problems.
Today, for the first time after uncapping my pen, I noticed green ink on my fingers and I am unsure exactly which part of the pen this came from. I therefore emptied and cleaned the pen. In doing so, I discovered that the connector was not glued in . Whilst this was interesting and saves me from messing around with my heat gun, I now want to complete the disassembly, remove the ink collector, nib and feed and apply fresh wax before reassembling and apply fresh shellac to keep it all in place. Meanwhile I shall avoid putting the pen in my new yellow-plush lined pen case.
Funnily enough, these various design weaknesses only endeared me more to the pen, since it needs looking after. It is still a beauty in my eyes, and although it is still early for such statements, it might just be my favourite Parker pen.


The 65 is divine. I inherited one via a friend with an OM nib. Just fabulous. I hope you enjoy yours.
LikeLiked by 1 person