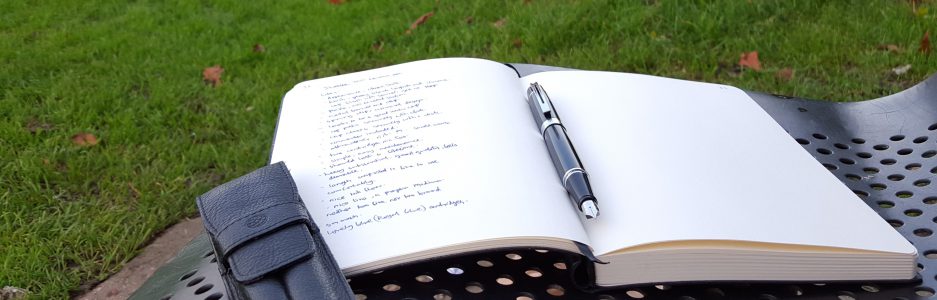
One of the challenges of running a fountain pen blog, is taking good quality photographs of the pens. We want our images to be well composed, sharply focused, with faithful colours and well lit.
It is very convenient to use the camera on a smart phone, which allows uploading of photos to the blog’s media library through WiFi, without connecting the camera to a computer to download the files. Smart phone cameras have improved enormously, in resolution and many other features.
It is easy to forget that our subjects need to be well lit, particularly if indoors using available light. A case in point is the photograph of my pen cups in my last post, The state of the pen cups, September 2021, where I over-estimated the quality of the lighting in the room and used an image which had areas of dark shadow.
One solution is to invest in studio lighting or a ring-flash for your SLR camera. Another more practical option for the amateur, is to try a portable “light box” with LED lights, powered by a USB cable.
My good friend Jon of Pensharing.com, provides advice for members on his website for photographing their pens for hire and recommends investing in a simple light box and a tripod. I bought a light box about a year ago, a self-assembly cube of white plastic, which had rows of many bright LEDs in the front and the back of the top section. The problem I soon found was that it was difficult to avoid reflections of all of these LEDs in the pens. Also the model I had bought was rather a faff to put up and take down, which also deterred me from getting it out much.
This weekend I found myself looking again on Amazon at the vast range of such lightboxes available. I wondered whether a model with a ring of LED lights might be easier to use. Also, I wanted to try one which was smaller, and more convenient than the one I had bought. The name Puluz was one that I kept noticing. Also, they had one in their range, which was small (about 9 inches across), had a ring LED pattern, boasted three different colour temperatures, an adjustable brightness, six different coloured backdrops, and cost only £14.99. Impressively, it arrived within a day of ordering.

Description.
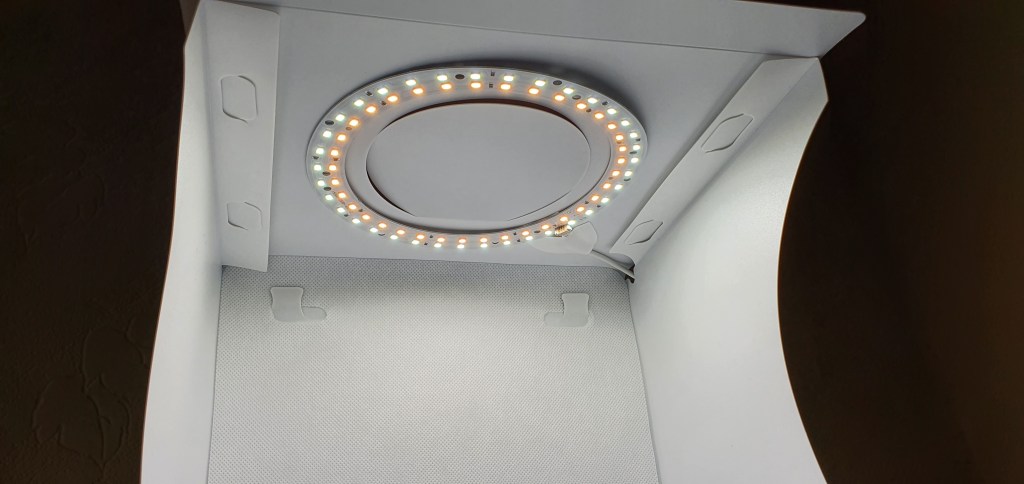
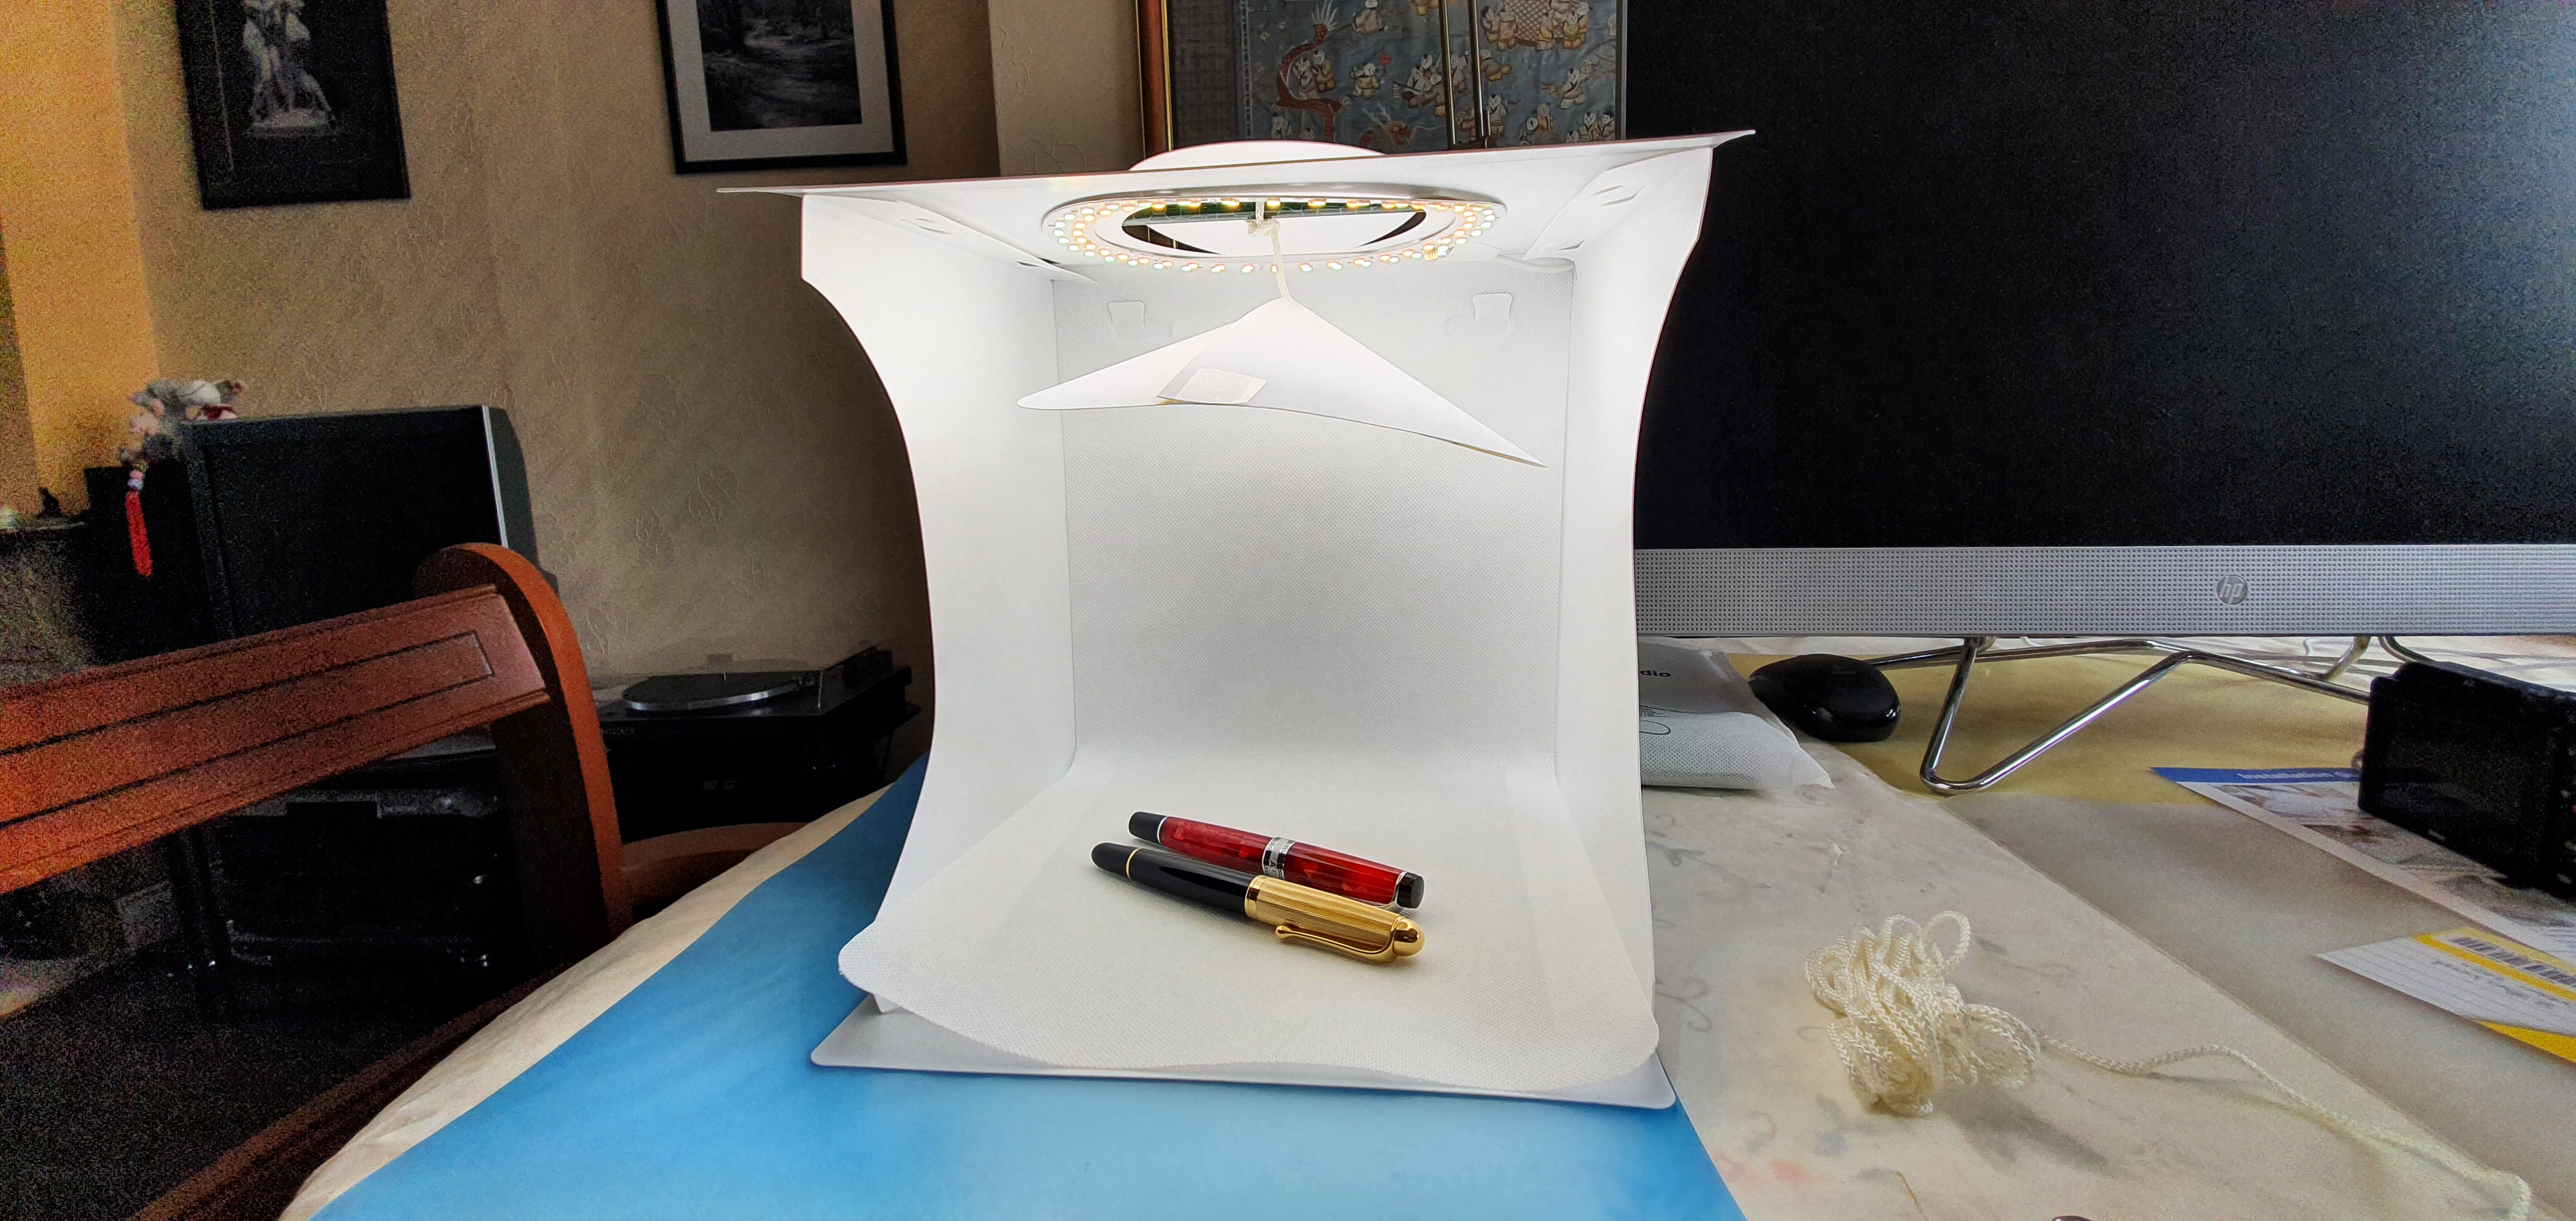
The Puluz “Mini Photo Box” is an open-fronted box measuring 23cm or 9″ wide. It is made of a white semi-rigid plastic. The five sides are all joined together and fold flat into a bag. To set it up, you just need to unfold it and assemble it into the box shape, clipping the sides to the base and to the top. They cleverly slot into each other and so there are no separate parts needed. It comes with six coloured backdrops, in black, white, blue, red, green and yellow.
The lighting comes from 72 LEDs arranged in two rings around the top (where a round flap can be opened for direct overhead shooting). One outer ring provides a cool, bluish light and the other, inner ring provides a warmer, orangey tone. These are powered by an attached USB capable, which needs to be connected to a power socket, PC or a portable USB power bank.
In use.
The box, the cable and the backdrops are all supplied in a handy white tote bag and weigh very little, making a very portable piece of kit.
The light box is straightforward to assemble and this takes only a couple of minutes. If you want to use one of the backdrops, you just hook it on to the tabs. It is easier to do this before you fold it all together.
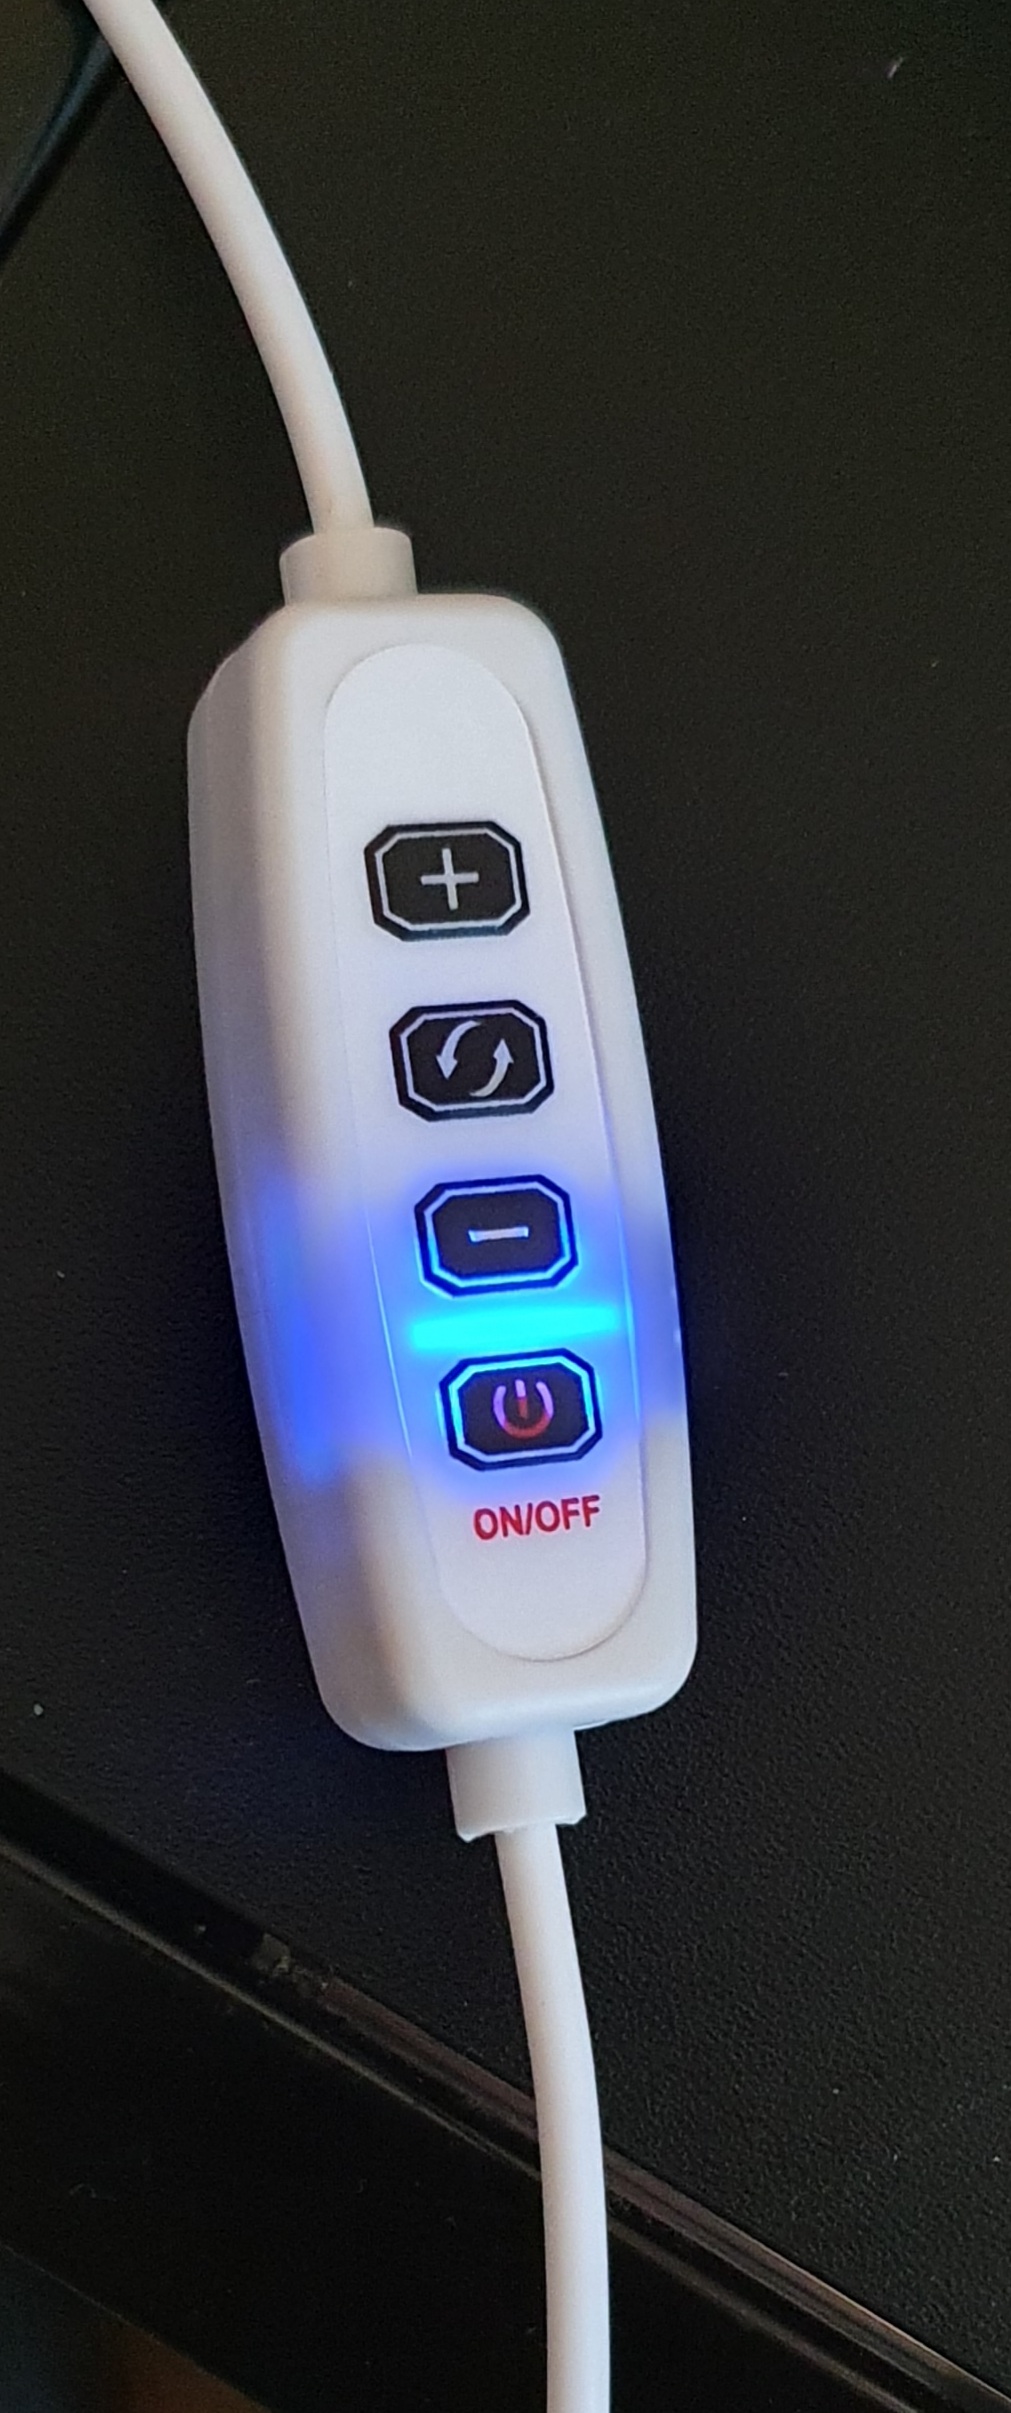
The USB power cable is fixed in place and about 2 metres long. About half way along the cable is the control switch. This has an on-off button. When plugged into a power source, but not switched on, a blue light glows to show that it is in stand-by mode.
There are three more buttons: the middle one alternates between the three colour temperature options, which, in simple terms, give you a lighting which is white, orange or blue (or which can be expressed as cool or warm tones). The other two buttons are plus and minus, to go up or down through the 10 brightness levels, in whatever colour you have selected. And so you have choice of 30 different settings all together.
To power the lightbox, I first connected the USB cable to a mains plug (usually reserved for my mobile phone). This is fine if you have a power socket nearby. But the control switch might then be dangling off the edge of your table. A more convenient method is to plug the cable into a rechargeable USB power bank (not supplied). I had an old one, with a 2,200 mAh capacity and charged it up for its new duties. With one of these, you can take your light box out and about, and use it anywhere without being tied to a power socket. I do not know how long a charge would last but there are models now with much higher capacity.
I spent a bit of time experimenting with the settings. The different colour tones are achieved by activating either the inner ring, outer ring or both. So far, I tend to prefer the white light (using both rings), but I found that when using the green backdrop, my Samsung Galaxy S10’s camera was a bit confused when trying to sort out the white balance. The green flickered between yellowy-green and bluey-green. Things were easier with the white backdrop. I have not tried the other backdrops yet.
As for the brightness settings, whilst you can see the lighting getting brighter or darker as you click through the steps, I found on looking back at my test photos, that it was hard to see much difference in the image, because the camera automatically compensates. Perhaps going for a mid-level brightness is the answer and then decide whether you need to go either brighter or darker from there.
Photographing pens.
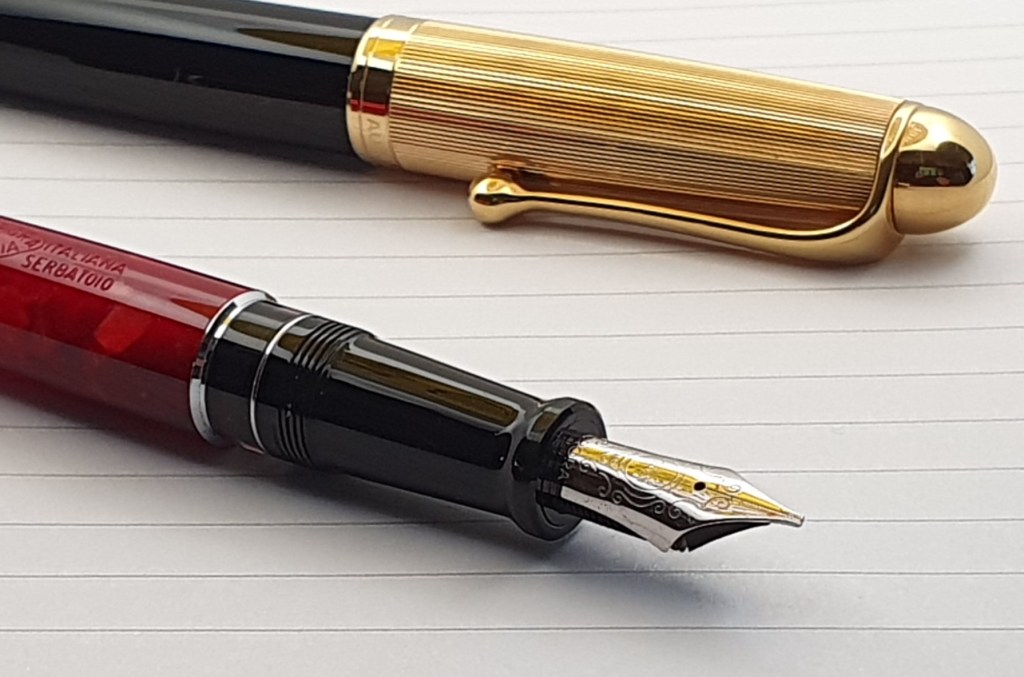
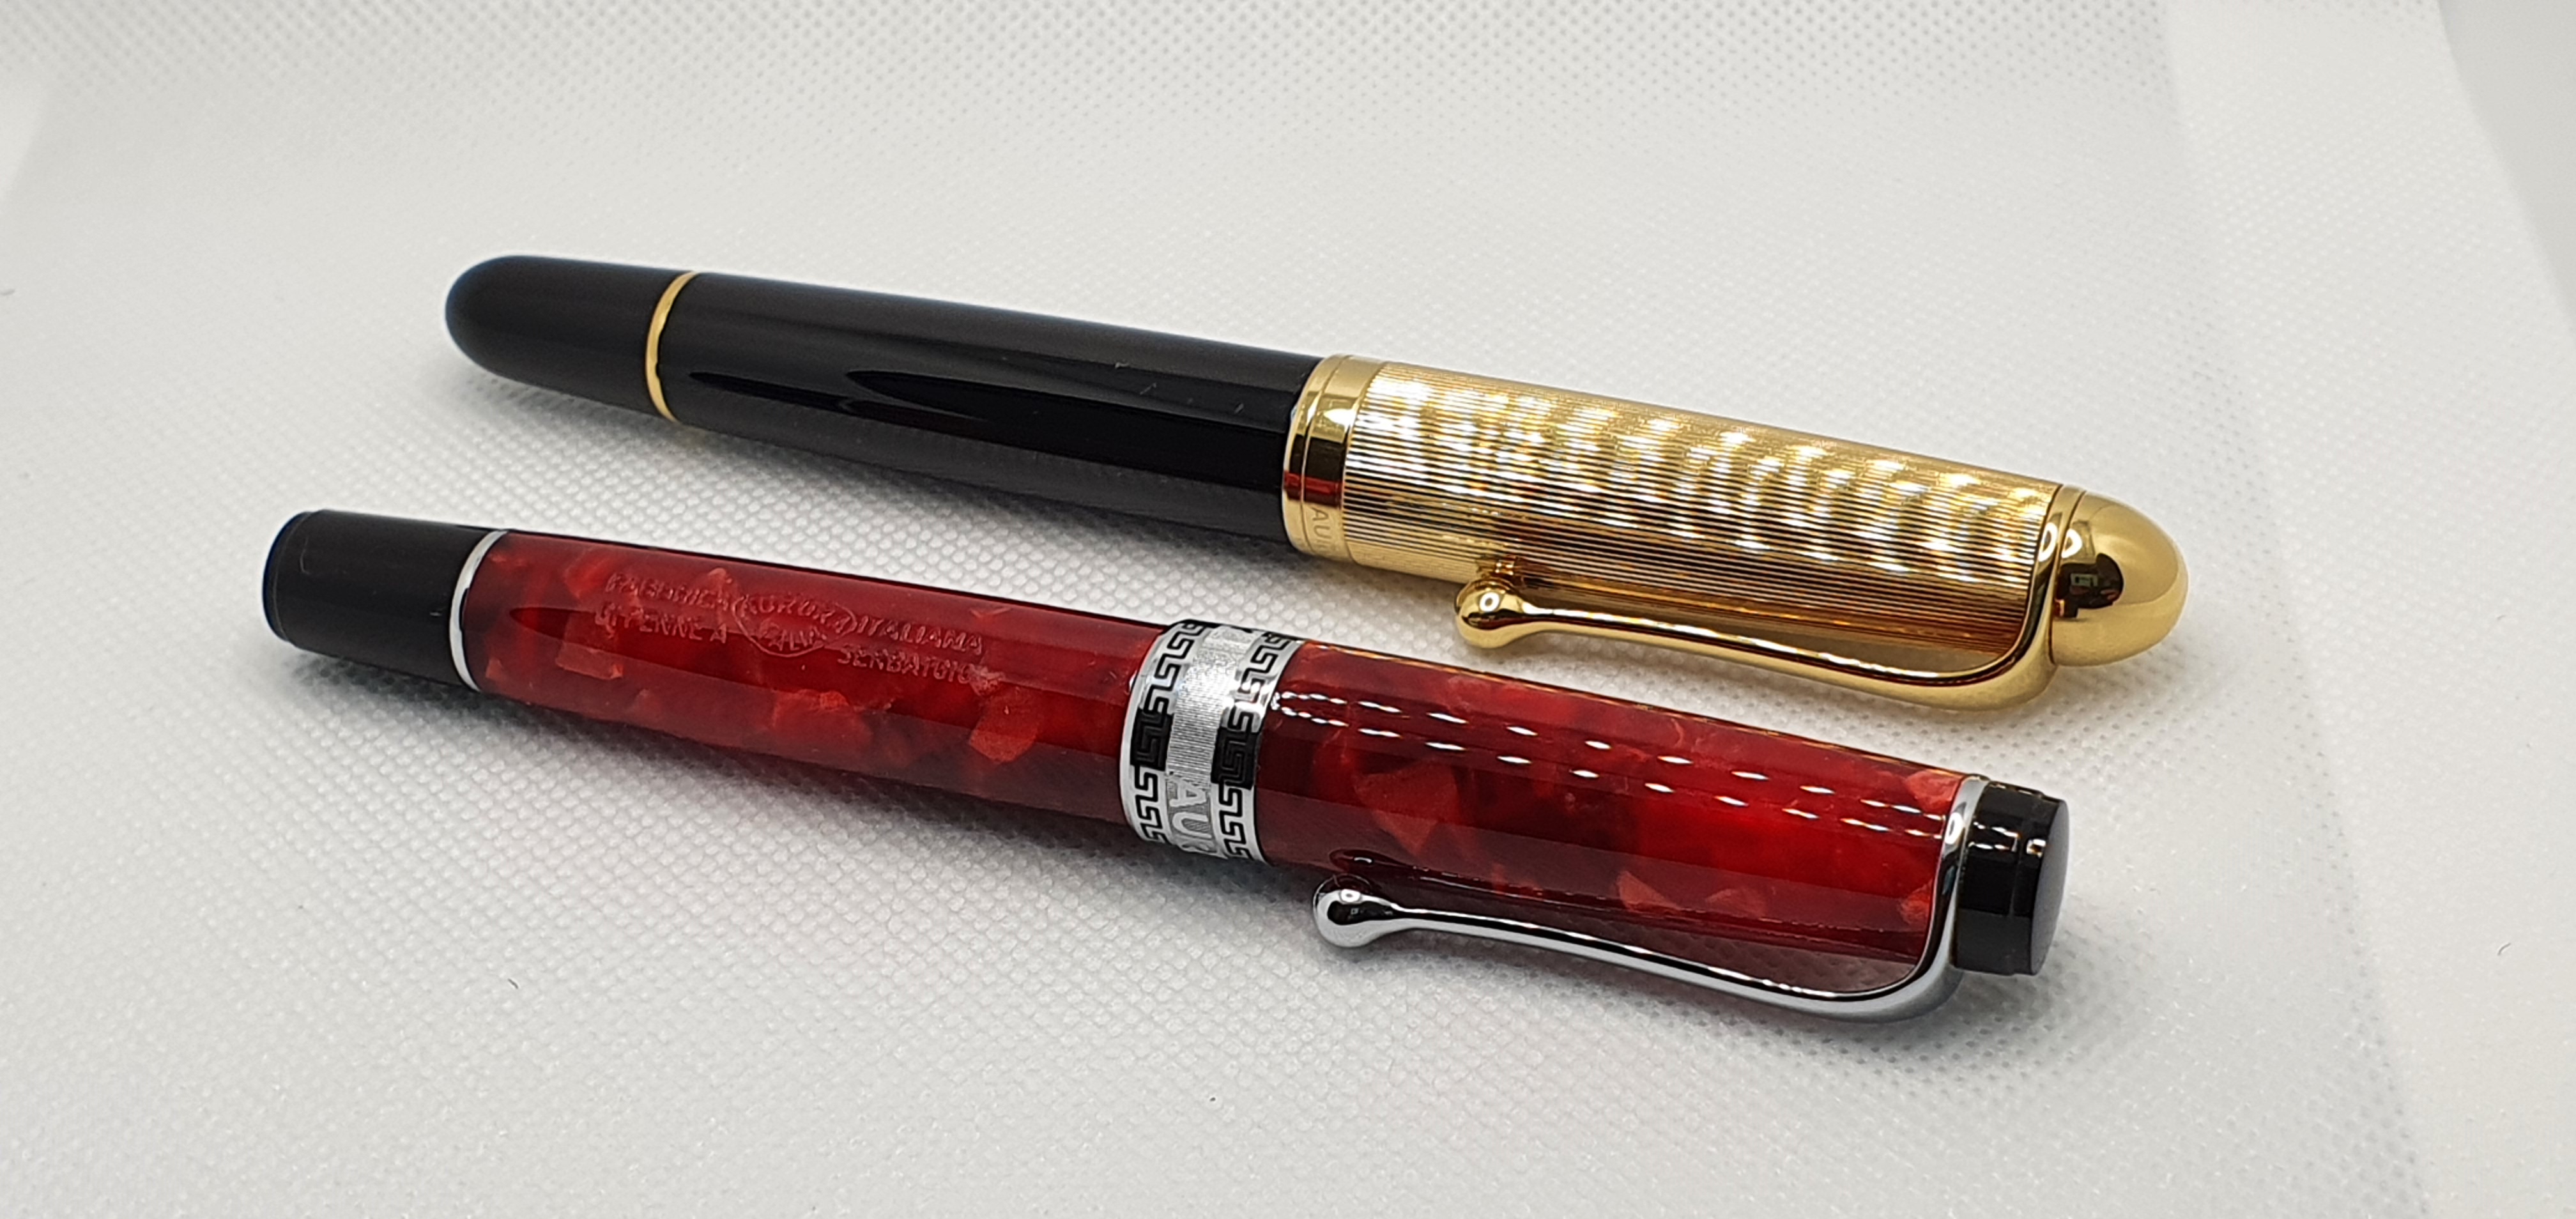
I tested the lighting first on my Aurora Optima, whose red Aureloide barrel would reflect the LEDs. Even though the LEDs are in a ring, you still find ugly reflections on the barrel, if you photograph the pen sideways on. You can reduce this to some extent by having the pen diagonal to the camera, but it is hard to eliminate it completely.
It occured to me that what was needed, was a light shade, to block off the LEDs and instead deflect the light to the white sides of the light box where it can be reflected down softly, rather like using a bounce-flash pointed at the wall or ceiling instead of your subject.
The hack.
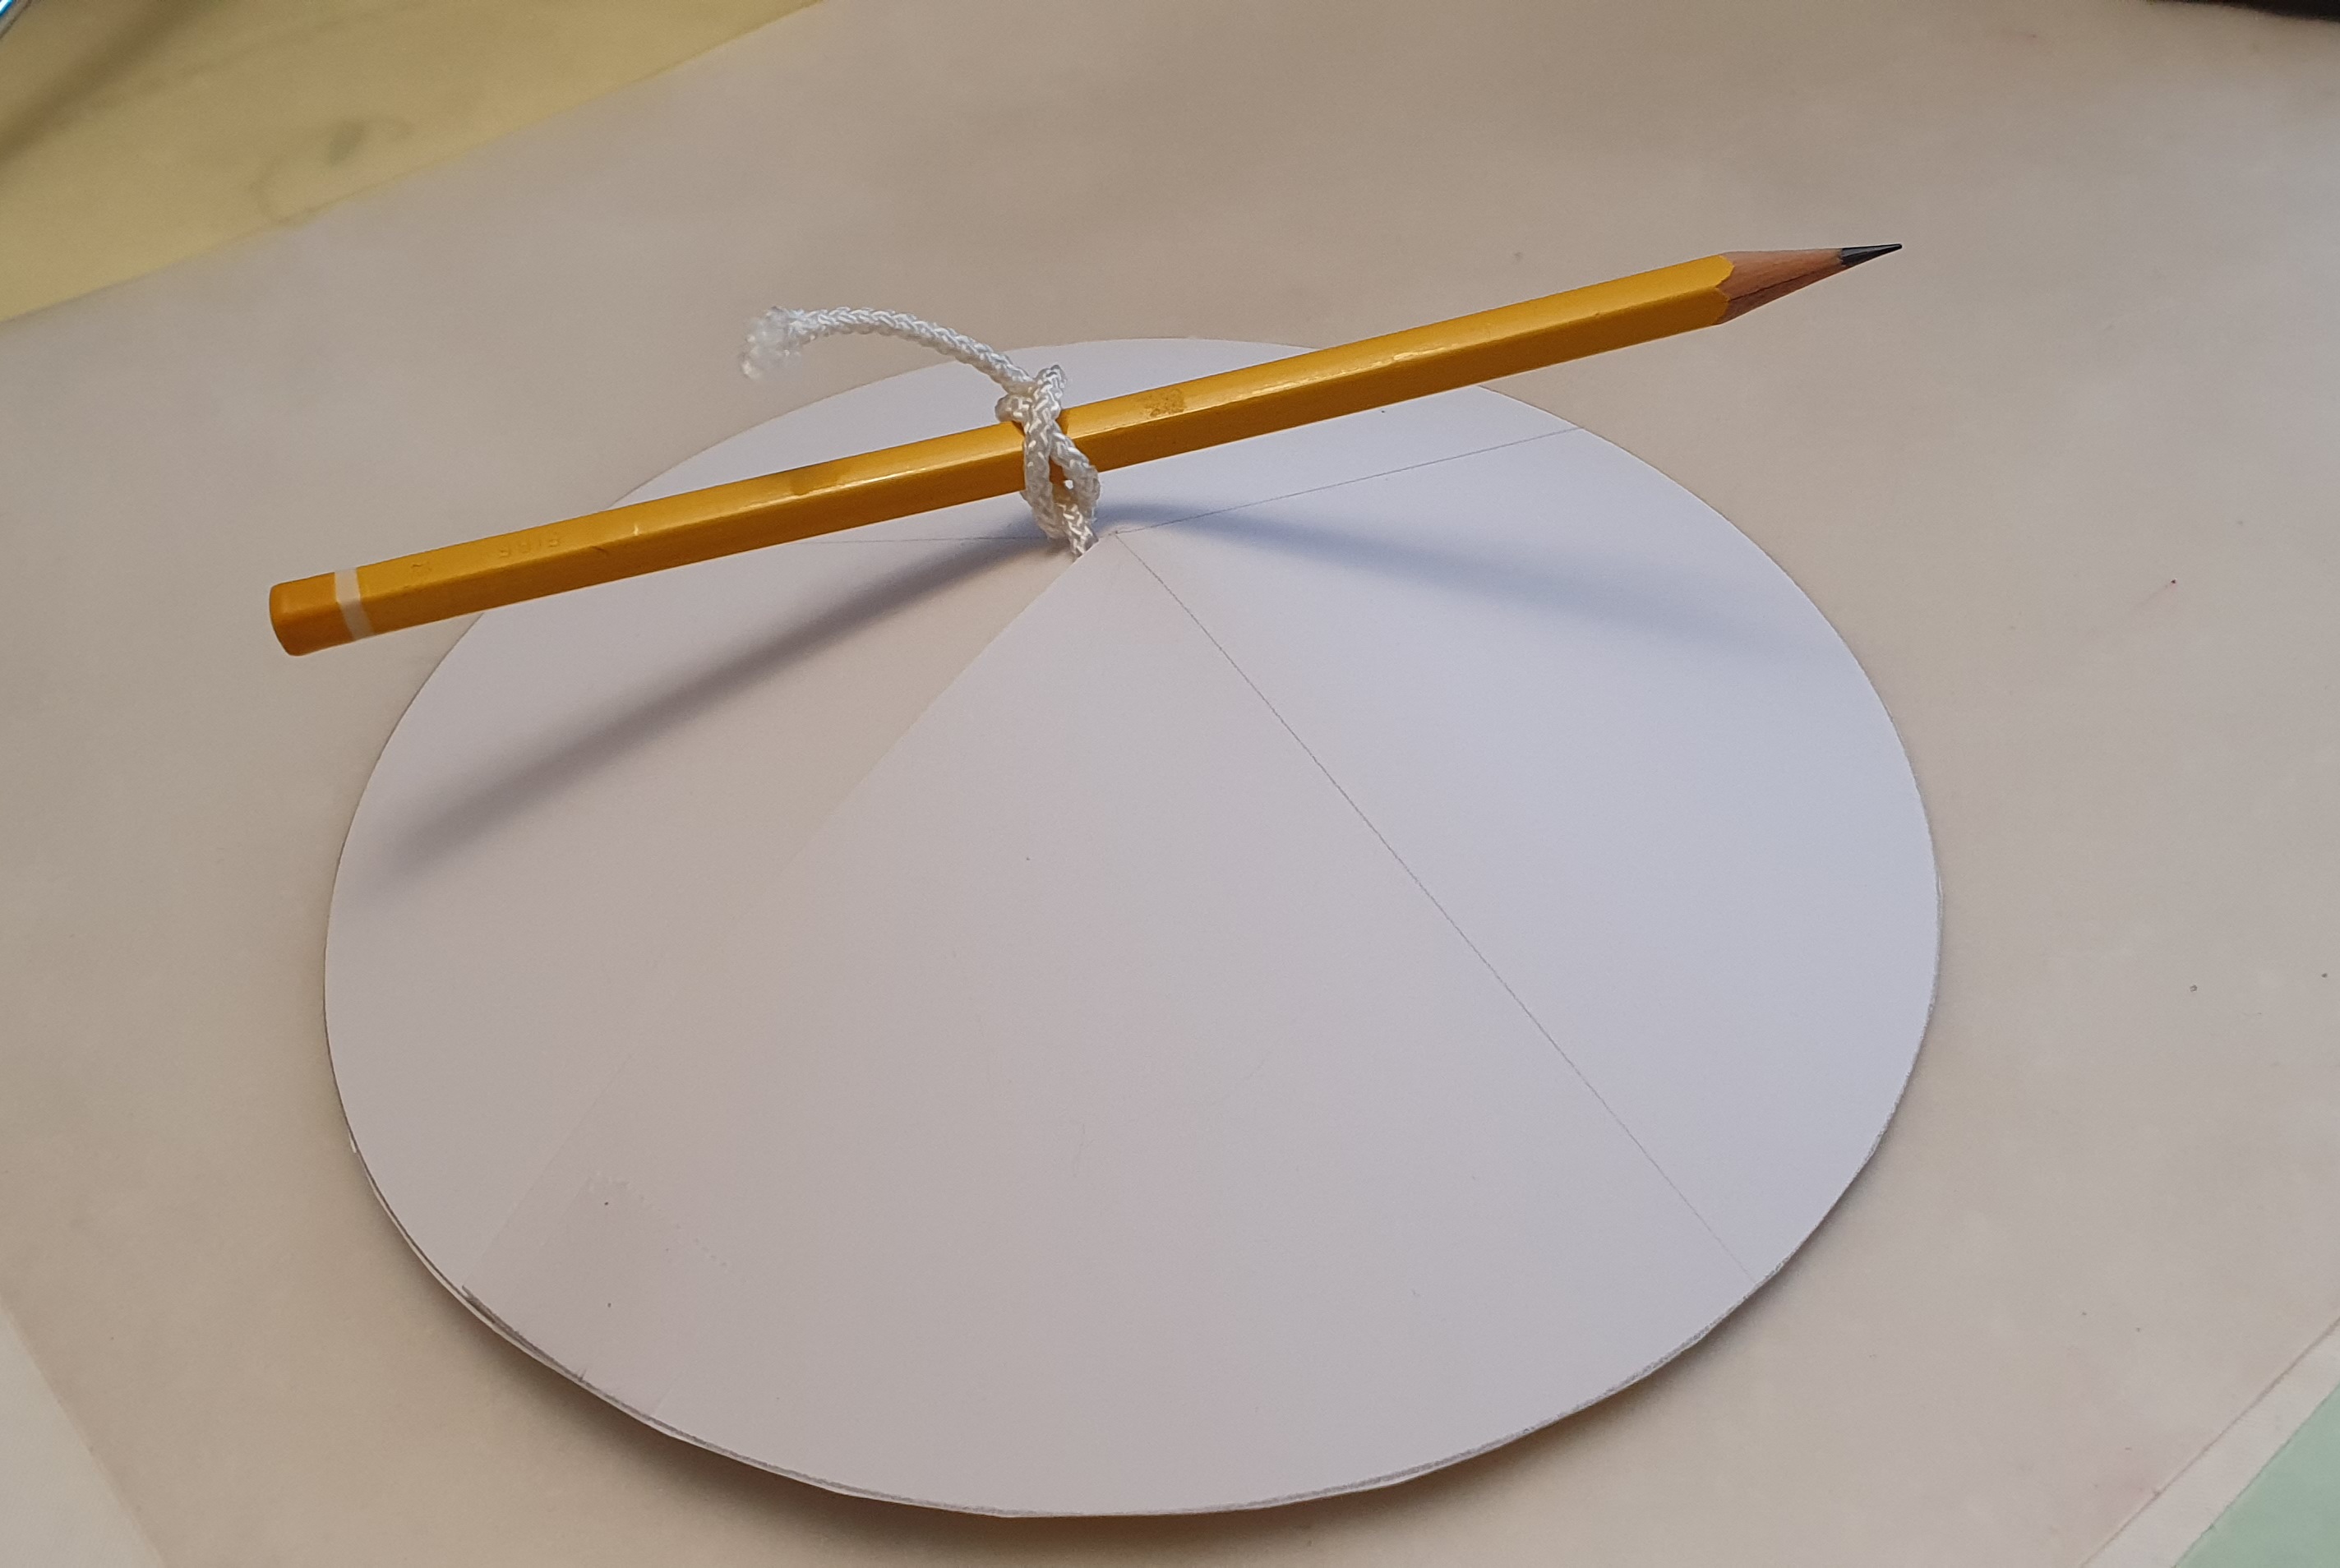
I cut out a circle of white card, having drawn around a plate. I then cut out a small wedge shape, like a piece of pizza, then drew the sides together so that the disc was pulled into a cone. I tied this to a pencil, which I then used to suspend the disc through the hole, just below the LED’s.
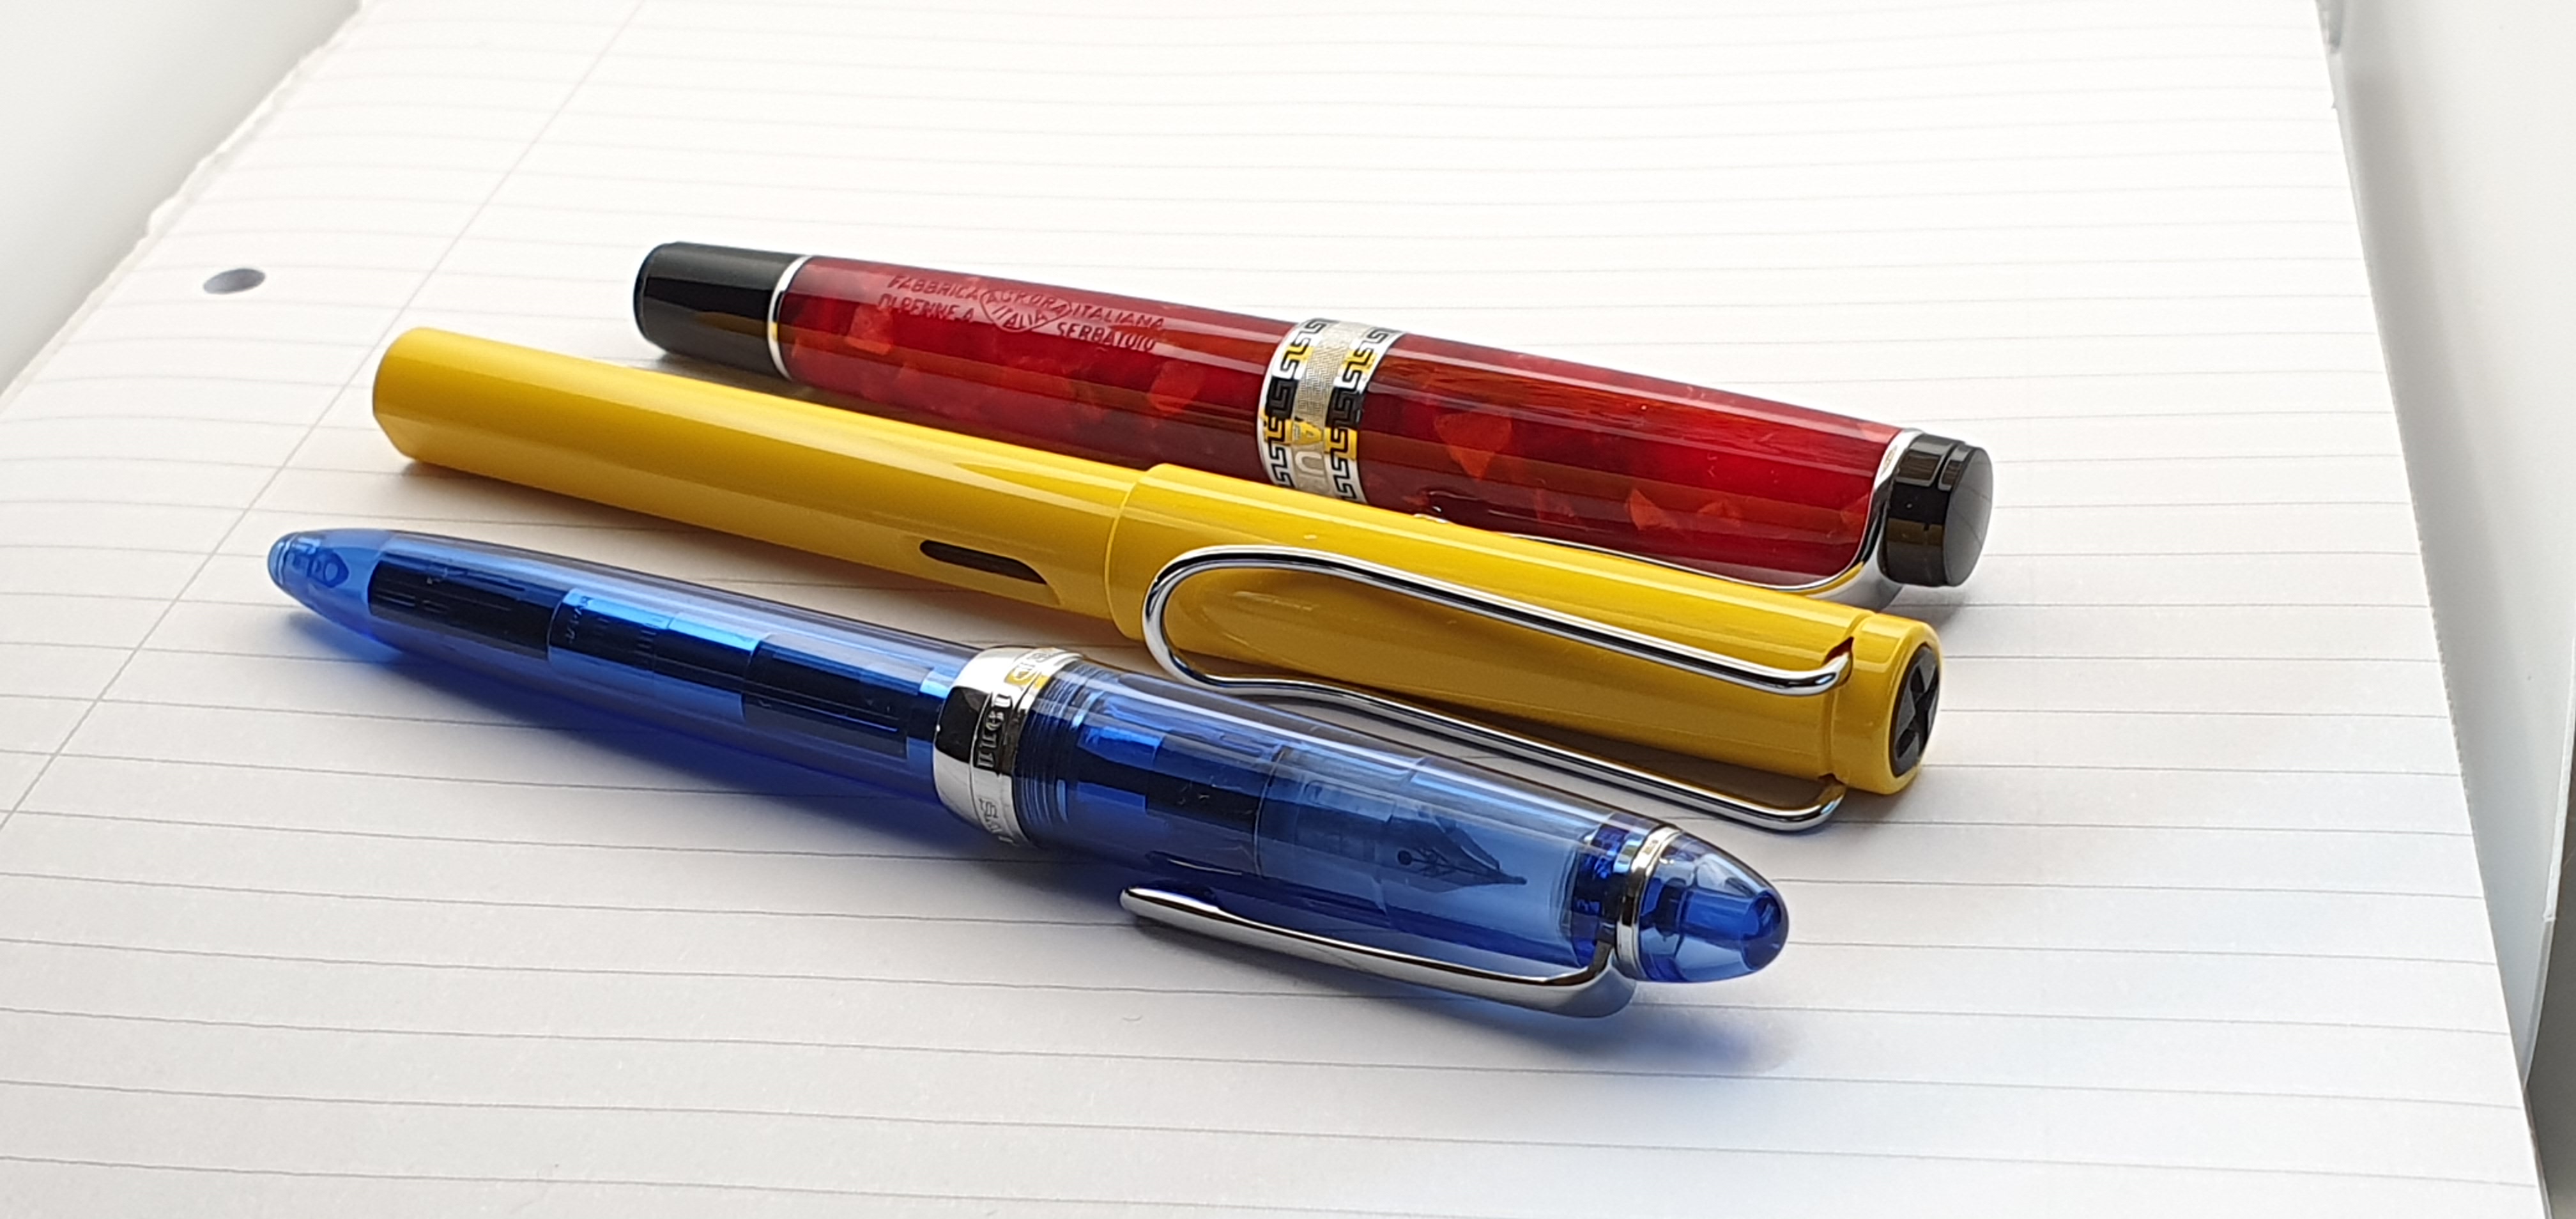
I then re-took the photos of my Auroras and found, to my delight, that the harsh reflections were eliminated and I now had the capability to take pen photos, day or night, with lighting under my control!

Conclusions.
It is early days, but provided that the LEDs and the control switch don’t break, this is a very useful accessory, for photographing fountain pens, or jewellery or other small items. It is modestly priced and with a little practice and experimentation, can help produce some excellent photos to enhance a blog.
Personally I think it would be better still if it came with a simple lamp shade, perhaps made from the same material as the lightbox and with a means of attaching and removing it. This makes a vast improvement if photographing pens or other reflective items.
All photos taken with Samsung Galaxy S10 smartphone. All pens photographed in a Puluz Ring LED mini light box.

I like your shade 🙂
Mine is old school, and rarely used as a result. It’s a larger fold out unit about 40cm each side once set up, with the sides and top being translucent white material so you can shine light through them, meaning you still need studio lights or panel LEDs, and these still can cause reflections like you initially suffered. A manager of mine at the time that while it was cheap in a sale at Maplins, his was even cheaper being a cardboard box with holes cut in the sides and tracing paper stuck over…
LikeLiked by 1 person
Thanks Gary. I am interested to hear what set-ups others use.
The material that mine is made from is also translucent and so you could light it from outside and then you would get a nice soft diffuse light.
LikeLike
Bloody brilliant Rupert! You and I have been having the same problems, and even surfing similar solutions! You beat me to it, and have given me some great pointers. Up until now, I have gone for “subdued lighting in a moofily-lit office” photos. I may be able to brighten things up a bit now 😂 Thank you!
LikeLiked by 1 person
Thankyou Paul. I am here to help! It is interesting to look through some of the pen photos on social media and see how others tackle the lighting problem. You can sometimes spot the tell-tale reflections from a ring flash even in beautifully lit shots.
Yes, mood lighting could be a good euphemism for inadequate lighting.😄
LikeLike
I have many euphemisms for a great many inadequacies 🤣
LikeLiked by 1 person
That sounds like an excellent purchase for this time of year as we head towards the long dark evenings. The lampshade is a great idea, too.
LikeLiked by 1 person
Thanks Pamela. I must admit it is fun having a new accessory to play with and I was very pleased with myself at having re-invented the lamp shade. I have not seen anyone else using one and it is surprising, as it makes such a big improvement if you are photographing pens. I suppose people might use the light box for all sorts of small subjects or products not all of which are going to suffer from reflections from the LED’s like pens do.
LikeLike
Knowing your (and L’s) interest in photography, it’s fun to read how the proverbial sausage is made.
LikeLiked by 1 person
Mine just are arrived and realised the LED ring reflection is showing up on objects as I take pictures of mobile phones. I will try this ‘custom come’ hack and see if it helps. Ps I also use a Samsung s10 for my photography 🙂
LikeLiked by 1 person
A lamp shade will certainly solve this problem. Or you may experiment by taking the photos from different angles.
LikeLike
Anybody know how to fix my issue? When I press the on button it just lights up and then turns off right away. I’ve fixed this issue before but can’t remember how?
LikeLike
If you are powering the appliance from a USB charging pack, it could be that it needs recharging. Otherwise, it sounds like it could be loose wiring in the power switch. I have not had this problem with mine.
I am not qualified to advise on electrical faults. If there is a fault, it is not worth taking risks and giving yourself and electric shock. If in doubt, contact the seller.
LikeLike