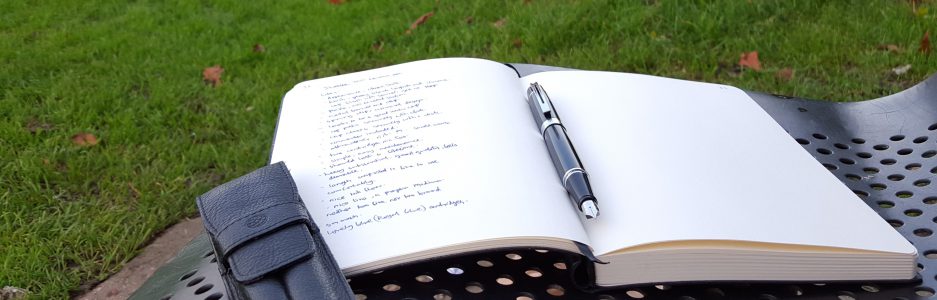
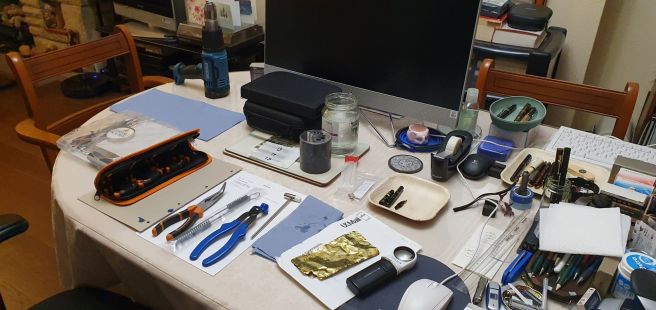
As mentioned in my recent posts, I have been attending a practical course on fountain pen repair. Although very much a beginner, it has been fascinating to learn the correct ways to use the various tools involved and very satisfying to restore a vintage pen to life, when it goes well.
In between the sessions we are encouraged to “practice, practice, practice.” It is sensible not to go straight in with a valuable pen as there is a risk, or even a likelihood, of making mistakes and breaking your pen.
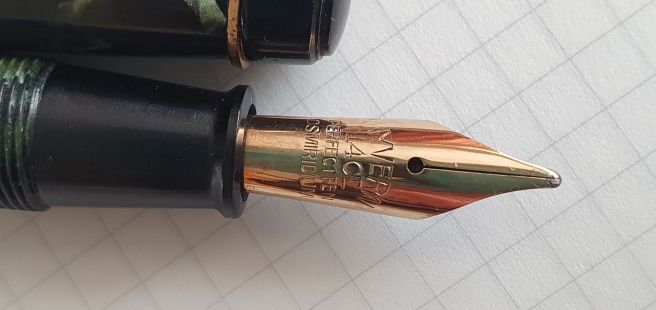
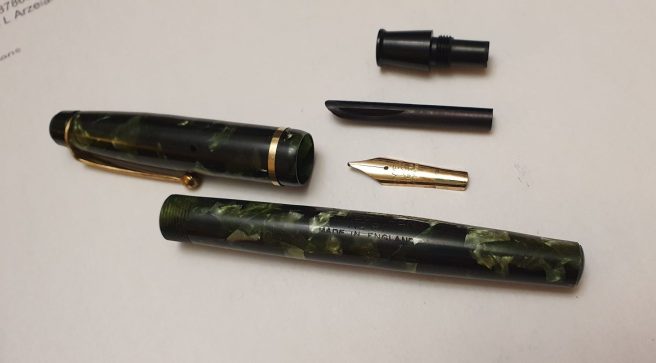
One of my recent early practice exercises was a Wyvern fountain pen, bought on eBay at a modest sum, advertised as for spare parts or repair. The pen was not in working order and the seller had been unable to remove the barrel. Nevertheless, it was an attractive pen in marbled green celluloid (I think), a lever filler with a 14k gold nib. Also, what was especially appealing was that the pen still bore its original paper price band stating “Wyvern No.81, 14ct Solid Gold Nib, Broad” and the price, including tax, of 22 shillings, 7 and a half pence. As a reminder for younger or overseas readers, there were 12 pennies to a shilling, and 20 shillings to a pound (therefore, 240 pennies to a pound). This pen therefore sold for roughly £1.13 when new. We switched to decimal currency on 15 February 1971.
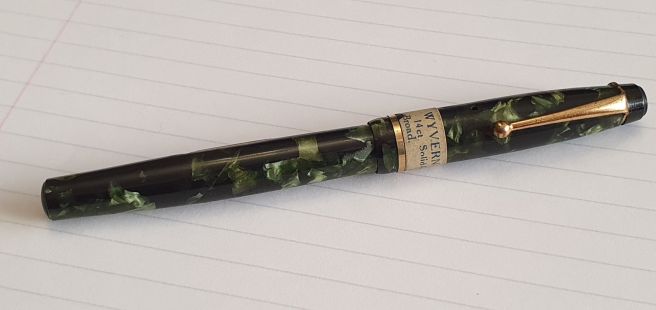
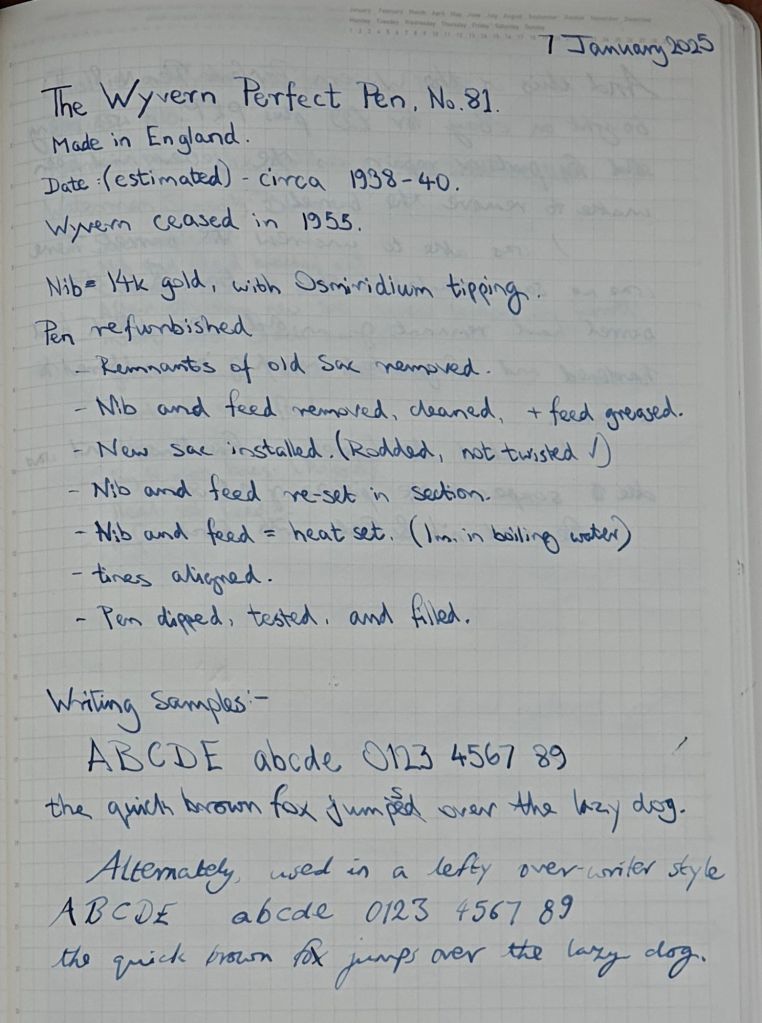
This is my first Wyvern fountain pen. I was aware that this was a British brand, beginning in 1896 and lasting until 1955. From brief searches online, I believe that my pen may date from around the late 1930’s.
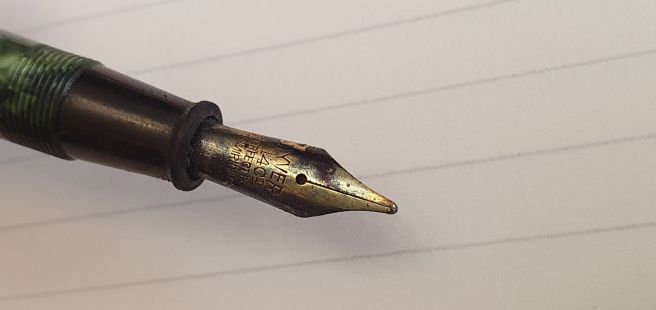
When the pen arrived, the body appeared to be in good condition with no apparent cracks. The barrel imprint (always pleasing to find!) was still clear. The nib was caked in dried ink but on cleaning this in water with a soft toothbrush, it came up gleaming.
The lever for the filling mechanism would not move, suggesting that the sac had perished and hardened inside the barrel. Fortunately, I was able to remove the barrel, by gripping it with pliers, with the jaws shielded by rubber (from a bicycle tyre inner tube). On this pen, the barrel unscrews from the section.
I was expecting to find the rubber sac hardened and cracked into loose debris, to be shaken out of the barrel. To my surprise, very little debris did come out initially. I could see hardened sac material stuck to the inside of the barrel, at the opening. The challenge was how to get this out as it was stuck hard to the barrel.
After establishing from a pen club friend that the barrel was not made of Casein (which must not be soaked in water as it will disintegrate), I was then confident to leave the barrel to soak in a jar of water overnight. I then tried scraping out the rubber residue, using a straightened out giant paper clip (carefully avoiding the pressure bar). Some fragments of rubber then started to come away. Patiently, I left the barrel to soak again for another night, before resuming my scraping. As well as tiny fragments and dust, a few larger bits of solidified rubber eventually came out, to my immense satisfaction.
Eventually, I was satisfied that I had removed all vestiges of the rubber. Inserting a brush, I was able to rotate this and clean the inside of the barrel nicely.
I had ordered a selection of replacement ink sacs, from The Pendragons. I also bought from them, some rubber-jawed section pliers, a pair of barrel-cleaning brushes and a nib knock-out block!
Fitting a new sac is a fairly straightforward but very satisfying task, for a beginner like me. Sometimes, removing the barrel is the trickiest part and soaking and/or heat is required. This was only my fourth such repair. Identifying the best size sac, if you have a few different sizes, is most easily done by introducing the sac to the barrel to find the largest diameter sac that fits, touching the sides lightly but without resistance. The length then needs to be trimmed, measuring from the sac nipple, to the end of the barrel, then shortening it a bit to allow some clearance at the back. To attach the sac, you apply shellac adhesive around the sac nipple. You also need French Chalk, (talcum powder) in which to roll the sac before it goes in the barrel, to prevent it from sticking to the sides.
However, before attaching the sac, there was another factor to bear in mind. As I said, the barrel was threaded, not friction fit. This meant that there was a risk of the sac being caught and twisted by the barrel. To avoid this, the nib and feed are removed from the section before fitting the sac. Assuming that the nib and feed cannot easily be pulled out, they are knocked out with a hammer and drift, using the knock-out block, having soaked the section in water first.
This leaves the section open whilst you attach the sac. You can then insert a rod (something not sharp) through the section and up into the sac, to keep it from twisting as you screw the section back into the barrel.
With the nib, feed and grip section separated, these can be cleaned. It is useful to floss the nib with a brass shim at this stage and check that the tine gap is as you like and the tines are level.
I was worried that the nib and feed would be difficult to push in, since they had been so tight to remove. I applied a little silicone grease to the outside of the feed, whilst trying to avoid any grease blocking the feed channel. It was still a tight fit to get the nib and feed back in, but all went well. Finally, I heat-set the nib and feed, dipping them in freshly boiled water for about a minute, squeezing them together for about half a minute and then cooling in cold water.
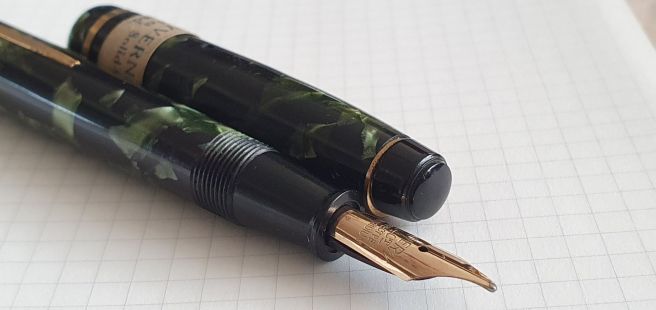
I was then finally able to test nib and fill the pen. I had deliberately refrained from writing with the nib beforehand, saving this treat until the new sac was installed and the pen ready for use.
I was surprised to find that the nib was much firmer than I expected and also that the line was not broad, but closer to a medium. However, the pen writes well, with a distinctive pencil-like feedback.
With every successful repair, one gains experience and confidence. I wish I knew more about this pen’s life and owners, during the last 80 years or so. I suspect that it had not been doing very much as the nib and sac could both be original. This will remain a mystery but I am happy to have the pen in use once again.

What an amazing story. Gripping.
I have read that many pens from, earlier times, had stiff nibs in order to write on three layers of carbon paper.
The pen looks lovely.
LikeLiked by 1 person
Thankyou for reading! Yes, I have heard that stiff nibs were intended to allow the user to produce carbon copies. I heard a theory that this was how the Parker Duofold got its name.
This makes sense and also helps show why ballpoint pens became such a threat to fountain pens.
LikeLiked by 1 person
Good job overhauling the pen! Looks great. I wish there was a pen repair class where I live. It looks like fun to bring a pen back to life.
LikeLiked by 2 people
Thankyou Debi! Yes it is very satisfying and enjoyable!
LikeLiked by 1 person
Congratulations on a job well done. A very lovely pen. You can judge the firmness of a nib by comparing the length of the tines to the girth of the nib at the shoulders. As these distances become the same the nib will have firmer qualities.
LikeLike
amazing post! I so enjoyed learning about the process, I often look at my pens and fear one day there will be no one to fix them so I default to converter pens even though I have a couple of gorgeous vintage Parker’s that are not operational
LikeLiked by 1 person
Thank you for reading! I still have a lot to learn about pen repair but already it has been great to see the results of even basic tasks such as replacing a sac or straightening a nib.
If you would like to use your vintage Parkers, I hope you can find someone able to service Parkers in your locality.
LikeLike